Aujourd'hui, un article sur la fabrication de panneaux de carrosserie en métal. Je vous laisse le soin de traduire car je ne veux pas faire d'erreurs.
GUIDE TO FORMING THE WIDE-BODY SHQRP HQ’S PANELS

THE art of hand-forming sheet metal into
complex shapes almost seems like black magic in this age of high-volume
production and exotic materials. But thankfully there are those among us
who still know one end of an English wheel from the other and aren’t
scared of a planishing hammer.
Which brings us to Jamie Downie and Nate Browne from Kustom Garage in
Melbourne’s eastern suburbs. One of their biggest projects in the past
year has been creating the rear quarters and door skins on Peter Sharp’s SHQRP Monaro; a project that was sub-contracted out to them by the guys at Taree’s Down Town Kustoms (DTK). DTK
has been transforming this HQ Monaro into a wide-body supercar for well
over 12 months now, and stripped the shell right down to its skeleton.
We’ve covered some of the previous work in SM, June and July 2014, but
since then the guys have moved on to the massive rear quarters. Creating
these from scratch is difficult enough, but ensuring they are exact
opposites is a huge job, so DTK farmed it out to Jamie at Kustom Garage.
DTK
has been transforming this HQ Monaro into a wide-body supercar for well
over 12 months now, and stripped the shell right down to its skeleton.
We’ve covered some of the previous work in SM, June and July 2014, but
since then the guys have moved on to the massive rear quarters. Creating
these from scratch is difficult enough, but ensuring they are exact
opposites is a huge job, so DTK farmed it out to Jamie at Kustom Garage.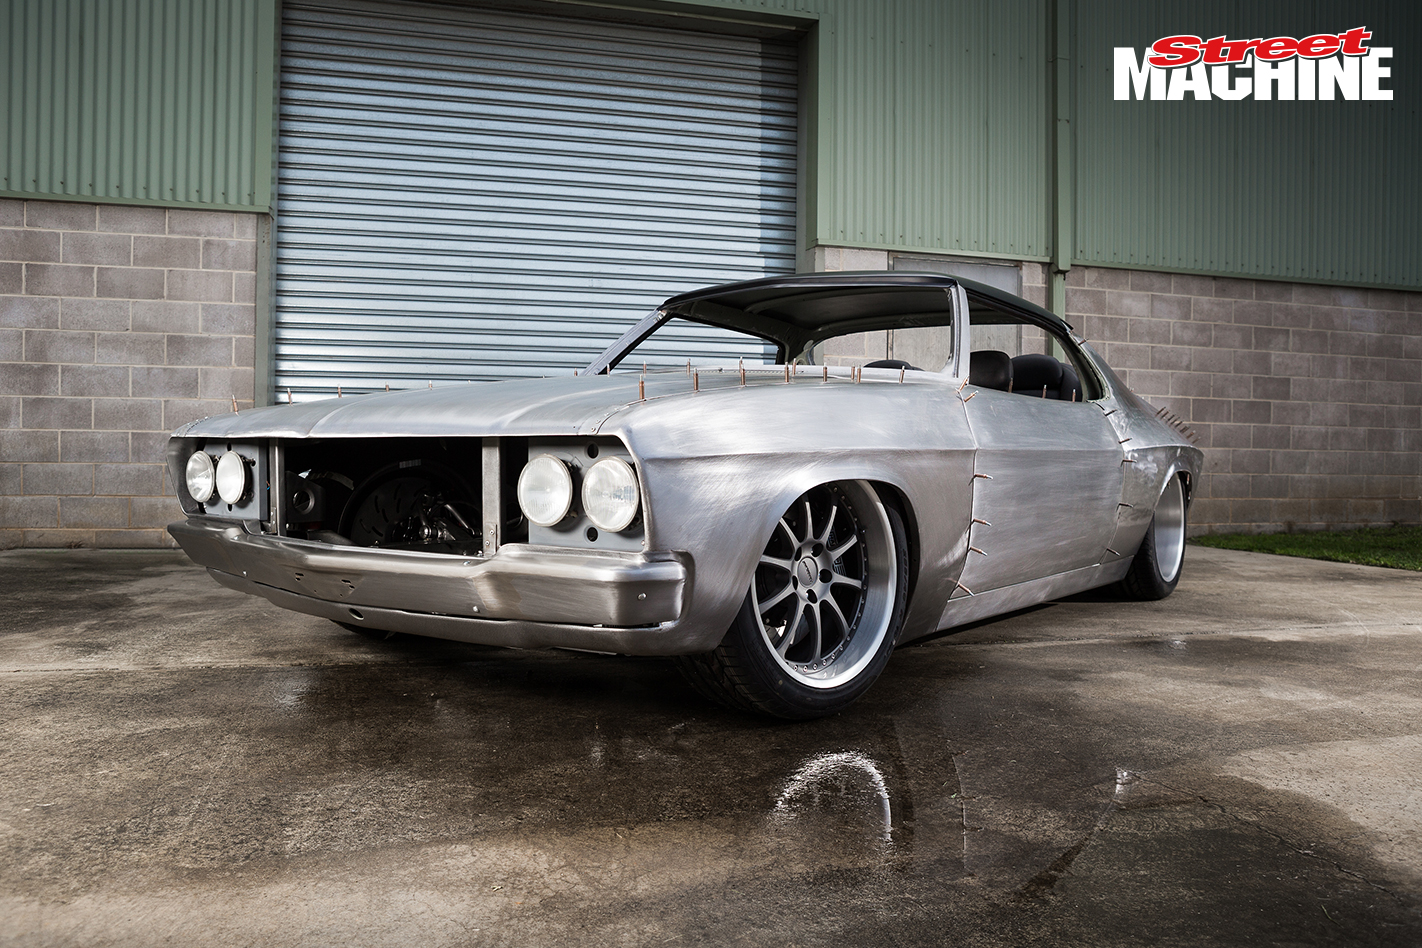 “Graeme
came down with one of the original quarter panels off the car and
together we spent a week working to create the shape that they wanted.”
Once they had the shape sorted, Jamie and Nate created a wooden buck out
of thick plywood and used that to make reversible paper patterns and
templates so they could transfer the shapes to flat steel sheet and get
the job underway.
“Graeme
came down with one of the original quarter panels off the car and
together we spent a week working to create the shape that they wanted.”
Once they had the shape sorted, Jamie and Nate created a wooden buck out
of thick plywood and used that to make reversible paper patterns and
templates so they could transfer the shapes to flat steel sheet and get
the job underway. When
we joined the boys at Kustom Garage they had already finished the
passenger-side rear quarter and door skin on SHQRP. The original job was
to do just the quarter, but the door skins then needed to be redone to
smooth the transition from front to rear
When
we joined the boys at Kustom Garage they had already finished the
passenger-side rear quarter and door skin on SHQRP. The original job was
to do just the quarter, but the door skins then needed to be redone to
smooth the transition from front to rear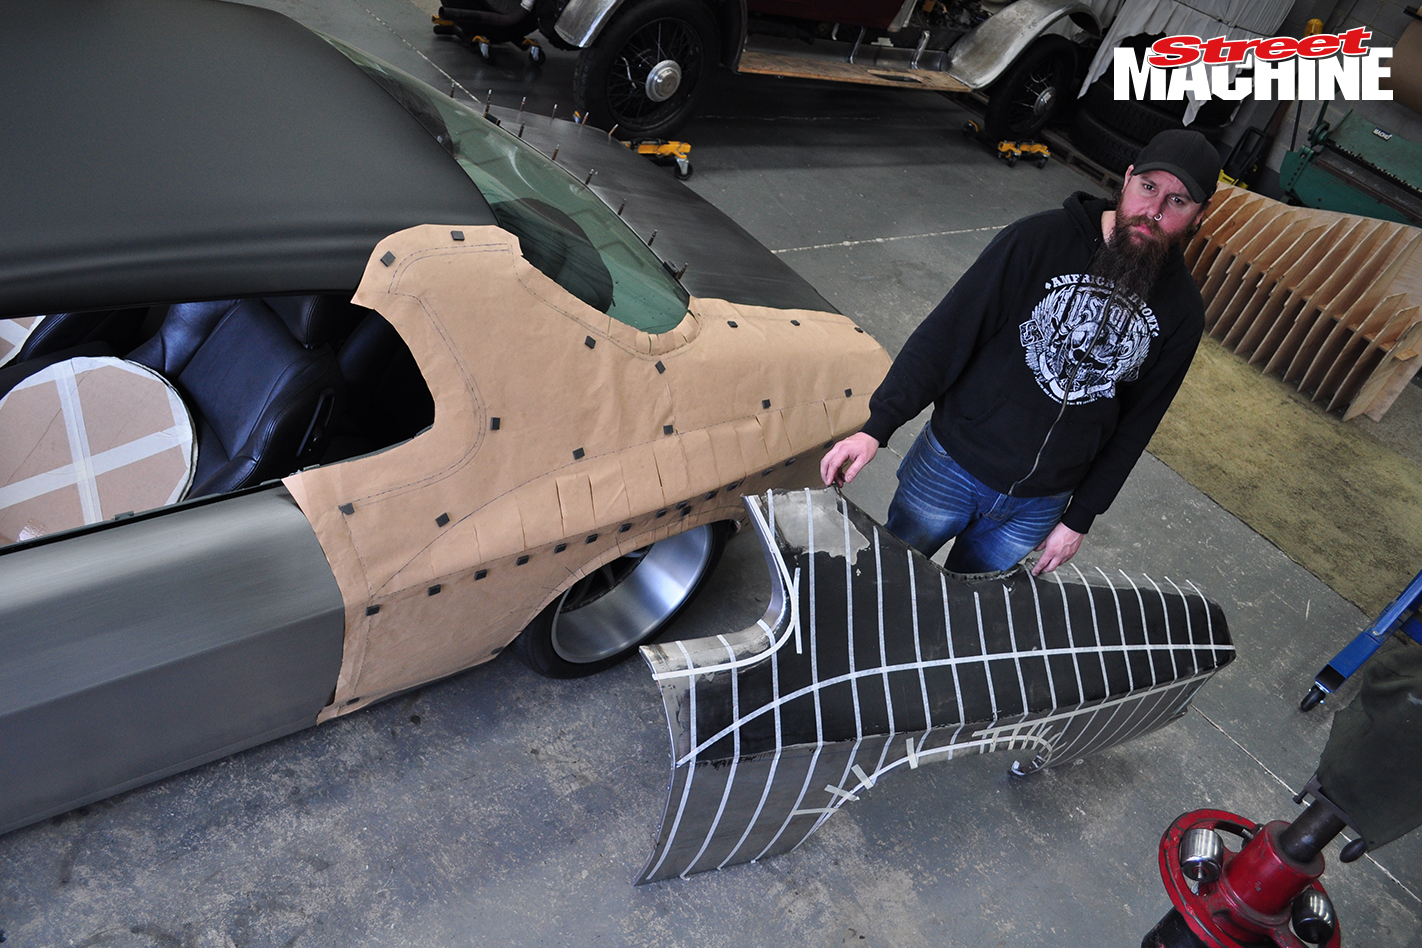 Jamie
and Graeme worked together to create the sample quarter within a week.
They use that to create the wooden buck, and form the two quarters that
will eventually go on the car
Jamie
and Graeme worked together to create the sample quarter within a week.
They use that to create the wooden buck, and form the two quarters that
will eventually go on the car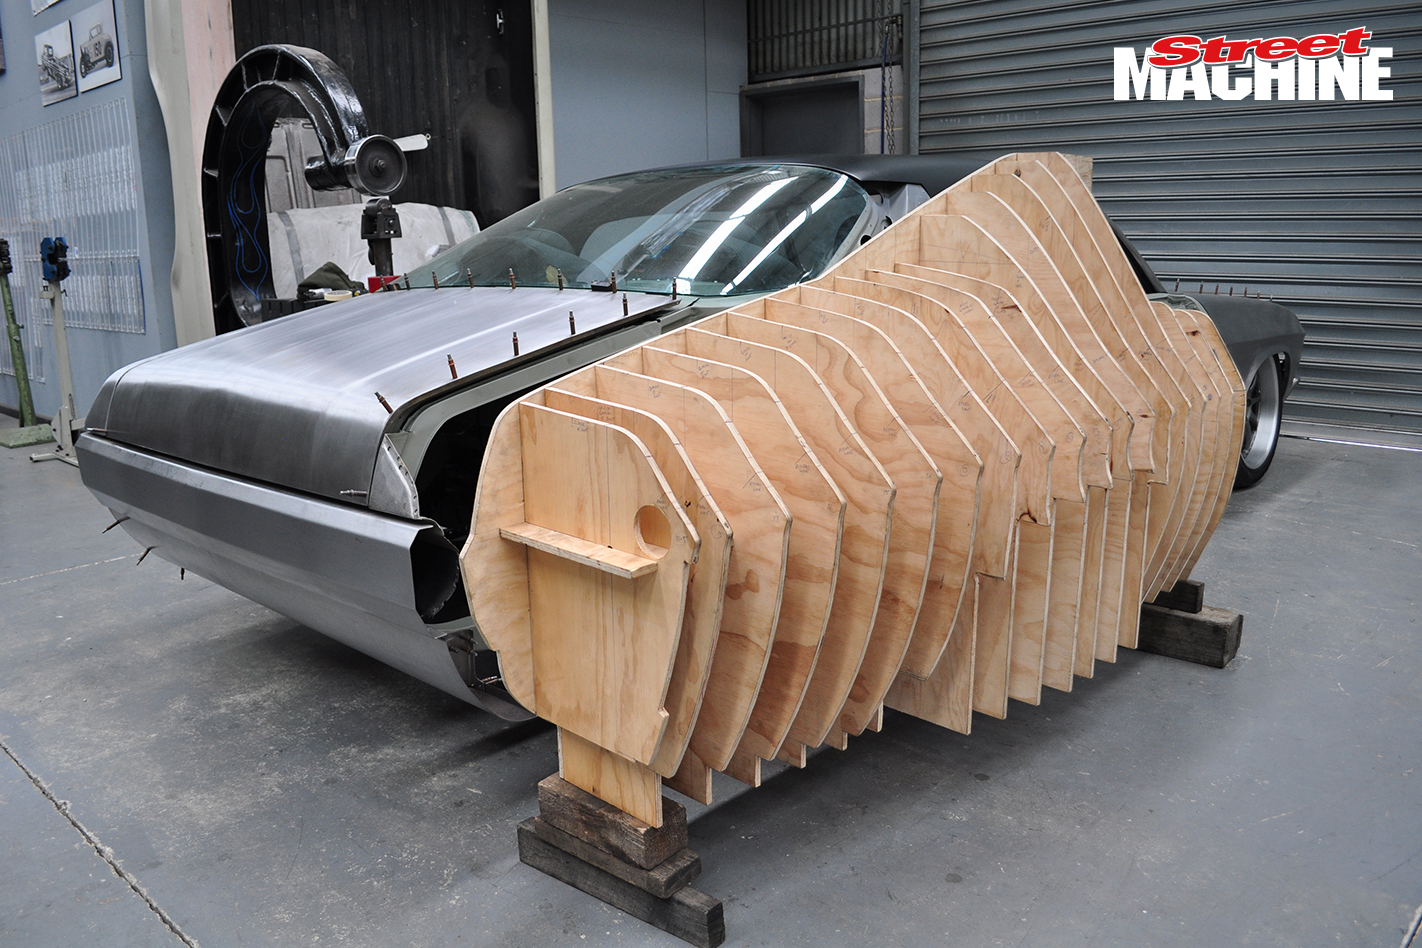 The
wooden buck outlines the shape of the rear quarter and is reversible by
swapping the pieces from one side of the backing board to the other
The
wooden buck outlines the shape of the rear quarter and is reversible by
swapping the pieces from one side of the backing board to the other Paper
patterns were created off the original sample panel. They show the size
and shape of each piece and are held in place by small magnets. When
laid on a flat piece of sheet steel the pattern is used to outline the
shape of each section
Paper
patterns were created off the original sample panel. They show the size
and shape of each piece and are held in place by small magnets. When
laid on a flat piece of sheet steel the pattern is used to outline the
shape of each section Jamie
uses a pen over the top of the paper templates to score out the shapes
of the four separate pieces that will make up the rear quarter, while
Nate uses masking tape to show the lines clearly
Jamie
uses a pen over the top of the paper templates to score out the shapes
of the four separate pieces that will make up the rear quarter, while
Nate uses masking tape to show the lines clearly Here
are the four pieces marked out on a fresh piece of 1mm CA3-grade steel
sheet. Creating the rear quarter out of one single piece is possible,
Jamie says, but would be much harder to manage due to its unwieldy size
Here
are the four pieces marked out on a fresh piece of 1mm CA3-grade steel
sheet. Creating the rear quarter out of one single piece is possible,
Jamie says, but would be much harder to manage due to its unwieldy size The
boys use an air nibbler to cut out the rough shapes quickly, staying
well outside the masking tape boundary. The size of the main sheet makes
it too hard to cut the pieces out with any kind of precision at this
point
The
boys use an air nibbler to cut out the rough shapes quickly, staying
well outside the masking tape boundary. The size of the main sheet makes
it too hard to cut the pieces out with any kind of precision at this
point Hand
shears are used to cut away the excess from each piece. Doing this by
hand is time consuming and tiring, but the precision is worth it. Then
the tape is peeled away and the edges are filed
Hand
shears are used to cut away the excess from each piece. Doing this by
hand is time consuming and tiring, but the precision is worth it. Then
the tape is peeled away and the edges are filed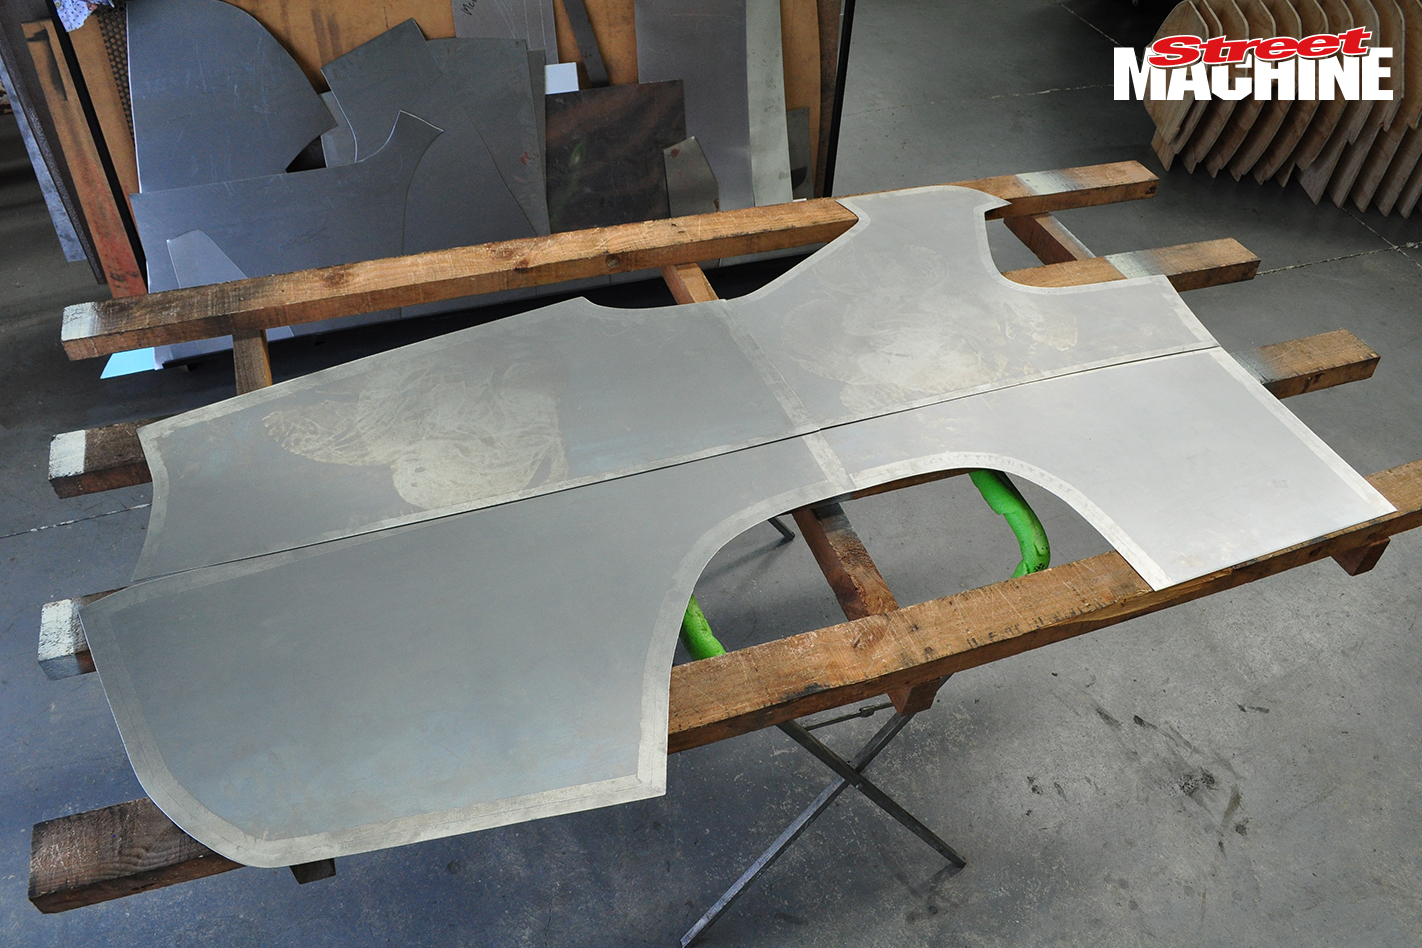 Here
are the four pieces in a flat arrangement as they will sit relative to
the HQ. There’s a stack of work to be done to create the necessary
curves and body lines – time to bring in the big guns
Here
are the four pieces in a flat arrangement as they will sit relative to
the HQ. There’s a stack of work to be done to create the necessary
curves and body lines – time to bring in the big guns The
biggest metal-shaping tool in Jamie’s workshop is Yoder, a 1942 power
hammer weighing in at three tonnes. It does the same job as an English
wheel – shaping panels – but uses a cyclical up-and-down motion
controlled by a speed-sensitive foot pedal. Definitely requires
ear-protection!
The
biggest metal-shaping tool in Jamie’s workshop is Yoder, a 1942 power
hammer weighing in at three tonnes. It does the same job as an English
wheel – shaping panels – but uses a cyclical up-and-down motion
controlled by a speed-sensitive foot pedal. Definitely requires
ear-protection! Remember
the paper patterns? Well they have measurements all along them that
correspond to points on each panel, and these cardboard templates are
used to check the shape of the curves
Remember
the paper patterns? Well they have measurements all along them that
correspond to points on each panel, and these cardboard templates are
used to check the shape of the curves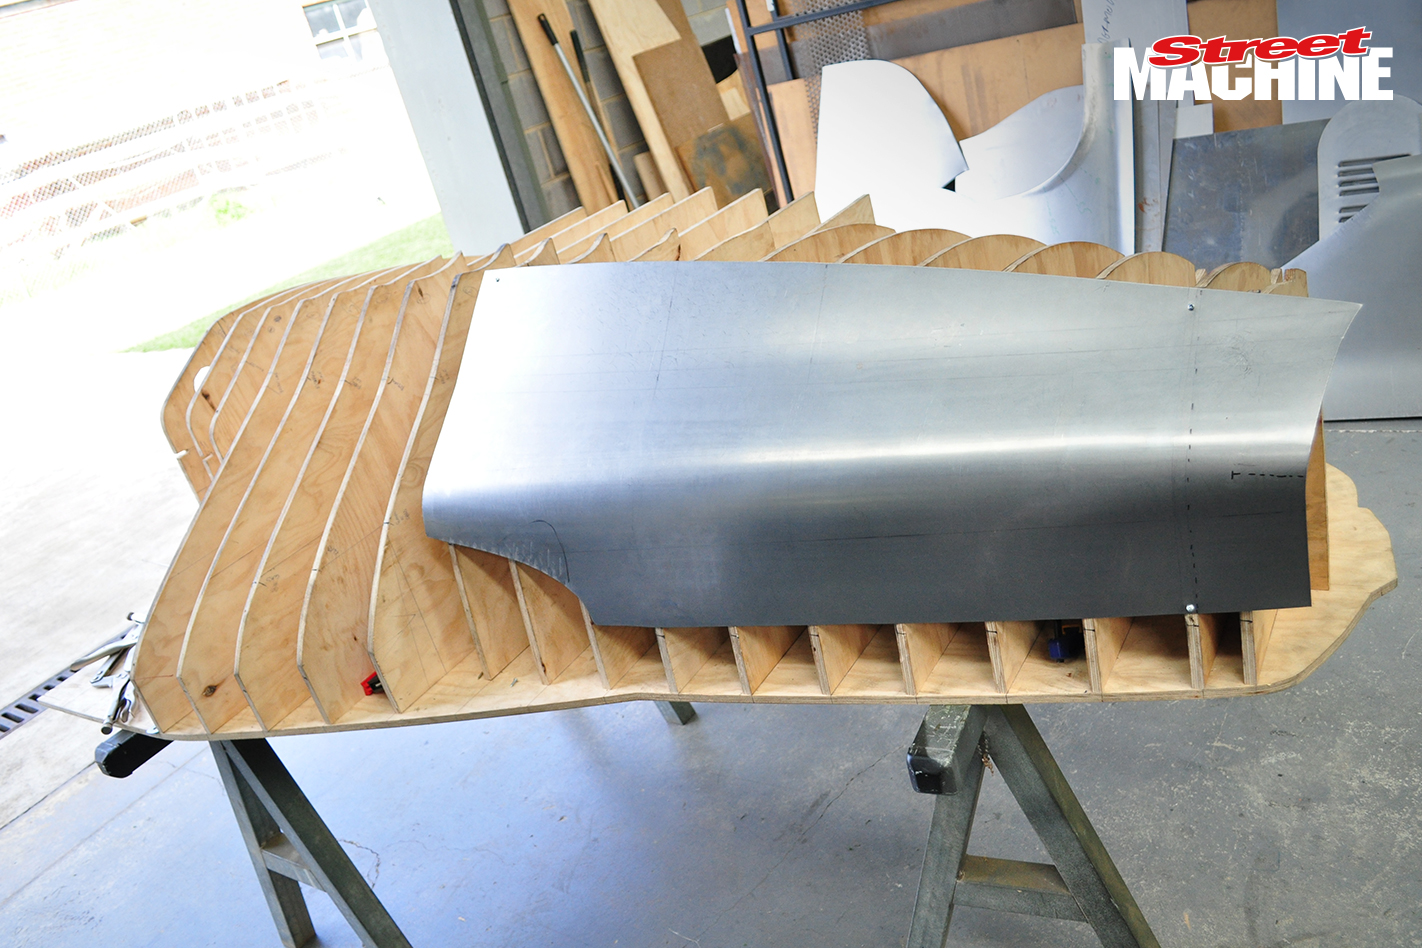 The
buck also comes in handy for holding pieces in place. Here, Jamie has
the top of the rear quarter fixed in the correct position while he works
the back corner into shape
The
buck also comes in handy for holding pieces in place. Here, Jamie has
the top of the rear quarter fixed in the correct position while he works
the back corner into shape From
there it’s back to Yoder to shrink the metal of that same back corner.
“Other than speed, this is the main advantage of a power hammer over an
English wheel,” Jamie says. “You can stretch metal with an English
wheel, but you can’t shrink it”
From
there it’s back to Yoder to shrink the metal of that same back corner.
“Other than speed, this is the main advantage of a power hammer over an
English wheel,” Jamie says. “You can stretch metal with an English
wheel, but you can’t shrink it” The
Pullmax can do all kinds of things depending on the dies used. In this
case Nate is making a fold line on the edge of the panel. Like the power
hammer, the bottom die is stationary while the top die rapidly cycles
up and down
The
Pullmax can do all kinds of things depending on the dies used. In this
case Nate is making a fold line on the edge of the panel. Like the power
hammer, the bottom die is stationary while the top die rapidly cycles
up and down Not
everything can be done with power tools; there’s still plenty to do
with the good old hammer and dolly. The bag on top of the panel, filled
with lead shot, helps hold the piece in place
Not
everything can be done with power tools; there’s still plenty to do
with the good old hammer and dolly. The bag on top of the panel, filled
with lead shot, helps hold the piece in place The
shrinker/stretcher does exactly what you think. Two pairs of jaws clamp
on the edge and pull away from each other to stretch, or push towards
each other to shrink, which helps make curves in panel edges
The
shrinker/stretcher does exactly what you think. Two pairs of jaws clamp
on the edge and pull away from each other to stretch, or push towards
each other to shrink, which helps make curves in panel edges With
the two top pieces roughly in the correct shape, they’re screwed to the
buck in preparation for welding together. The two bottom pieces will
also be welded together to create an upper and lower section
With
the two top pieces roughly in the correct shape, they’re screwed to the
buck in preparation for welding together. The two bottom pieces will
also be welded together to create an upper and lower section With
two halves bent, beaten and pressed into shape, they’re screwed to the
buck and the overlapping material is removed. Any remaining excess is
trimmed away with hand shears so the two halves butt up against each
other
With
two halves bent, beaten and pressed into shape, they’re screwed to the
buck and the overlapping material is removed. Any remaining excess is
trimmed away with hand shears so the two halves butt up against each
other Now
the pieces are carefully TIGed together, with the buck holding them in
place. Jamie likes to tack the panels together first with no filler rod,
then he goes over all the joins with the rod
Now
the pieces are carefully TIGed together, with the buck holding them in
place. Jamie likes to tack the panels together first with no filler rod,
then he goes over all the joins with the rod And
here we are, the first time the rear quarter is together as one single
piece, but there’s plenty left to do. The boys don’t grind the weld off;
they work it with a hammer and dolly and then smooth it flat with an
adjustable body file
And
here we are, the first time the rear quarter is together as one single
piece, but there’s plenty left to do. The boys don’t grind the weld off;
they work it with a hammer and dolly and then smooth it flat with an
adjustable body file Time
to test-fit the panel to the car. It’s really starting to take shape
now and you can see where the custom bumper has been recessed into the
rear, requiring some modification to the panel
Time
to test-fit the panel to the car. It’s really starting to take shape
now and you can see where the custom bumper has been recessed into the
rear, requiring some modification to the panel The
bumper recess is clamped into place prior to welding. Because of the
shape, the recess has been created separately and needs to be welded in.
As before, Jamie will tack the piece into place using the TIG without
filler
The
bumper recess is clamped into place prior to welding. Because of the
shape, the recess has been created separately and needs to be welded in.
As before, Jamie will tack the piece into place using the TIG without
filler This
is precision welding. There’s no point dumping excessive heat into the
panel, especially with a non-structural piece like this. That just
creates more work; they don’t grind the welds smooth for the same reason
This
is precision welding. There’s no point dumping excessive heat into the
panel, especially with a non-structural piece like this. That just
creates more work; they don’t grind the welds smooth for the same reason The
last piece of the puzzle is the rear window sill, which has to be
formed separately before it’s welded into position. Imagine trying to
create all those curves while wrangling the whole panel around
The
last piece of the puzzle is the rear window sill, which has to be
formed separately before it’s welded into position. Imagine trying to
create all those curves while wrangling the whole panel around Hammers,
dollies and body files are the tools of the trade when it comes to
finishing off the sheet metal. But you’ll need a whole lot of
experience, skill and patience to create metal magic like you’ve seen
here
Hammers,
dollies and body files are the tools of the trade when it comes to
finishing off the sheet metal. But you’ll need a whole lot of
experience, skill and patience to create metal magic like you’ve seen
here And
here’s the finished product – or finished from Jamie’s end, anyway. The
whole job – from creating the buck to the completed rear-quarters and
door skins – took 350 hours, or to put it another way, nine weeks of
eight-hour days full-time
And
here’s the finished product – or finished from Jamie’s end, anyway. The
whole job – from creating the buck to the completed rear-quarters and
door skins – took 350 hours, or to put it another way, nine weeks of
eight-hour days full-time
Aucun commentaire:
Enregistrer un commentaire